
Linux Ubuntu安装Syncthing
添加官方仓库源并安装
sudo mkdir -p /etc/apt/keyrings
sudo curl -L -o /etc/apt/keyrings/syncthing-archive-keyring.gpg https://syncthing.net/release-key.gpg

echo "deb [signed-by=/etc/apt/keyrings/syncthing-archive-keyring.gpg] https://apt.syncthing.net/ syncthing stable" | sudo tee /etc/apt/sources.list.d/syncthing.list

echo "deb [signed-by=/etc/apt/keyrings/syncthing-archive-keyring.gpg] https://apt.syncthing.net/ syncthing candidate" | sudo tee /etc/apt/sources.list.d/syncthing.list

sudo apt-get update
sudo apt-get install syncthing
创建systemd服务
创建服务文件:
sudo vim /etc/systemd/system/syncthing@.service粘贴以下内容:
[Unit]
Description=Syncthing - Open Source Continuous File Synchronization for %i
Documentation=man:syncthing(1)
After=network.target

[Service]
User=%i
ExecStart=/usr/bin/syncthing serve --no-browser --no-restart --logflags=0
Restart=on-failure
RestartSec=5
SuccessExitStatus=3 4
RestartForceExitStatus=3 4

[Install]
WantedBy=multi-user.target
应用并启动服务
sudo systemctl daemon-reload
sudo systemctl enable syncthing@$(whoami)
sudo systemctl start syncthing@$(whoami)

# 验证服务状态
systemctl status syncthing@$(whoami)
更改为局域网访问(可选)
如果是无桌面环境的服务器安装,可能需要执行这一步
打开配置文件
vim ~/.local/state/syncthing/config.xml找到
<gui>部分并将127.0.0.1修改为0.0.0.0<gui enabled="true" tls="false" debugging="false" sendBasicAuthPrompt="false"> <address>0.0.0.0:8384</address> <metricsWithoutAuth>false</metricsWithoutAuth> <apikey>xxxxxxxxx</apikey> <theme>default</theme> </gui>重启服务
sudo systemctl restart syncthing@$(whoami)
打开服务
打开链接http://x.x.x.x:8384
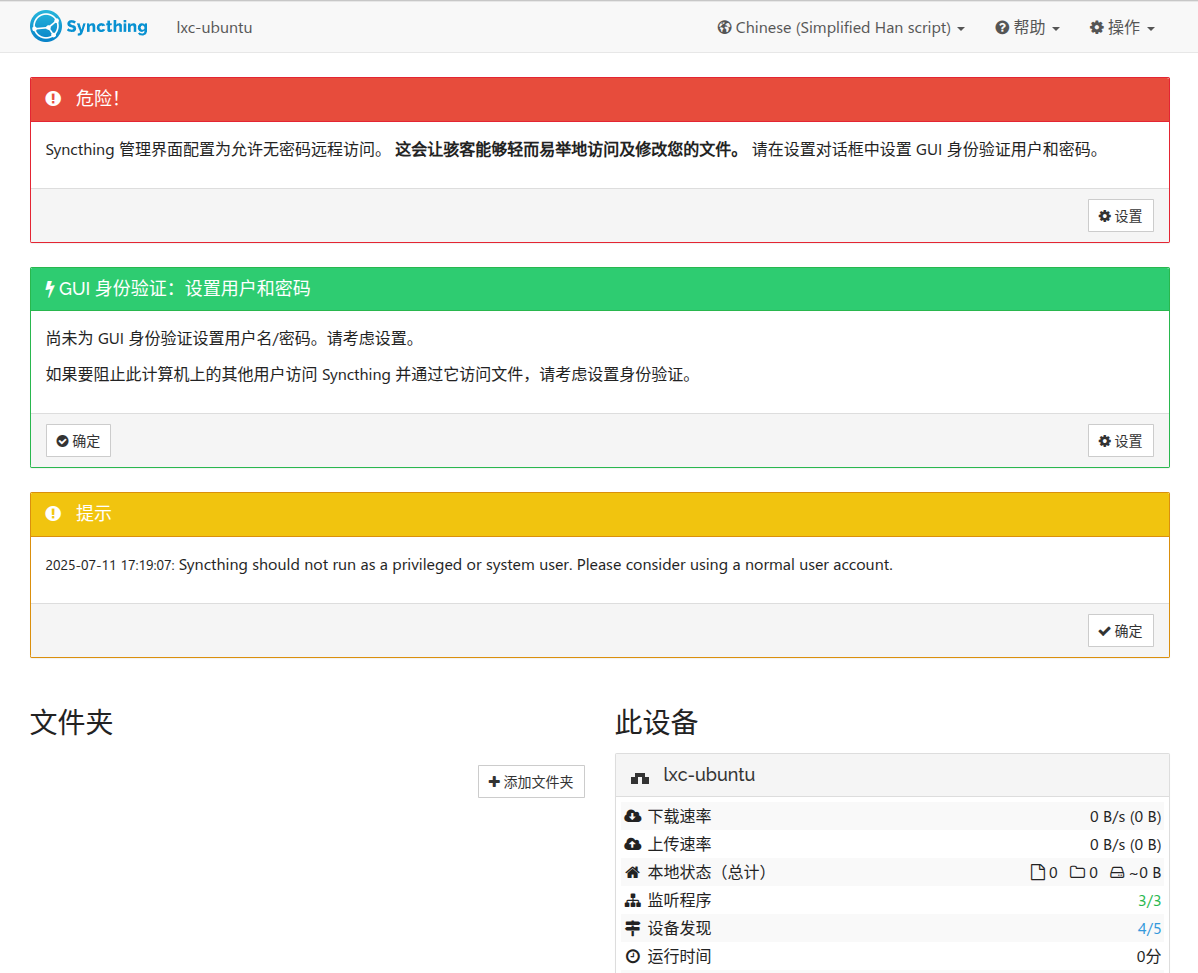
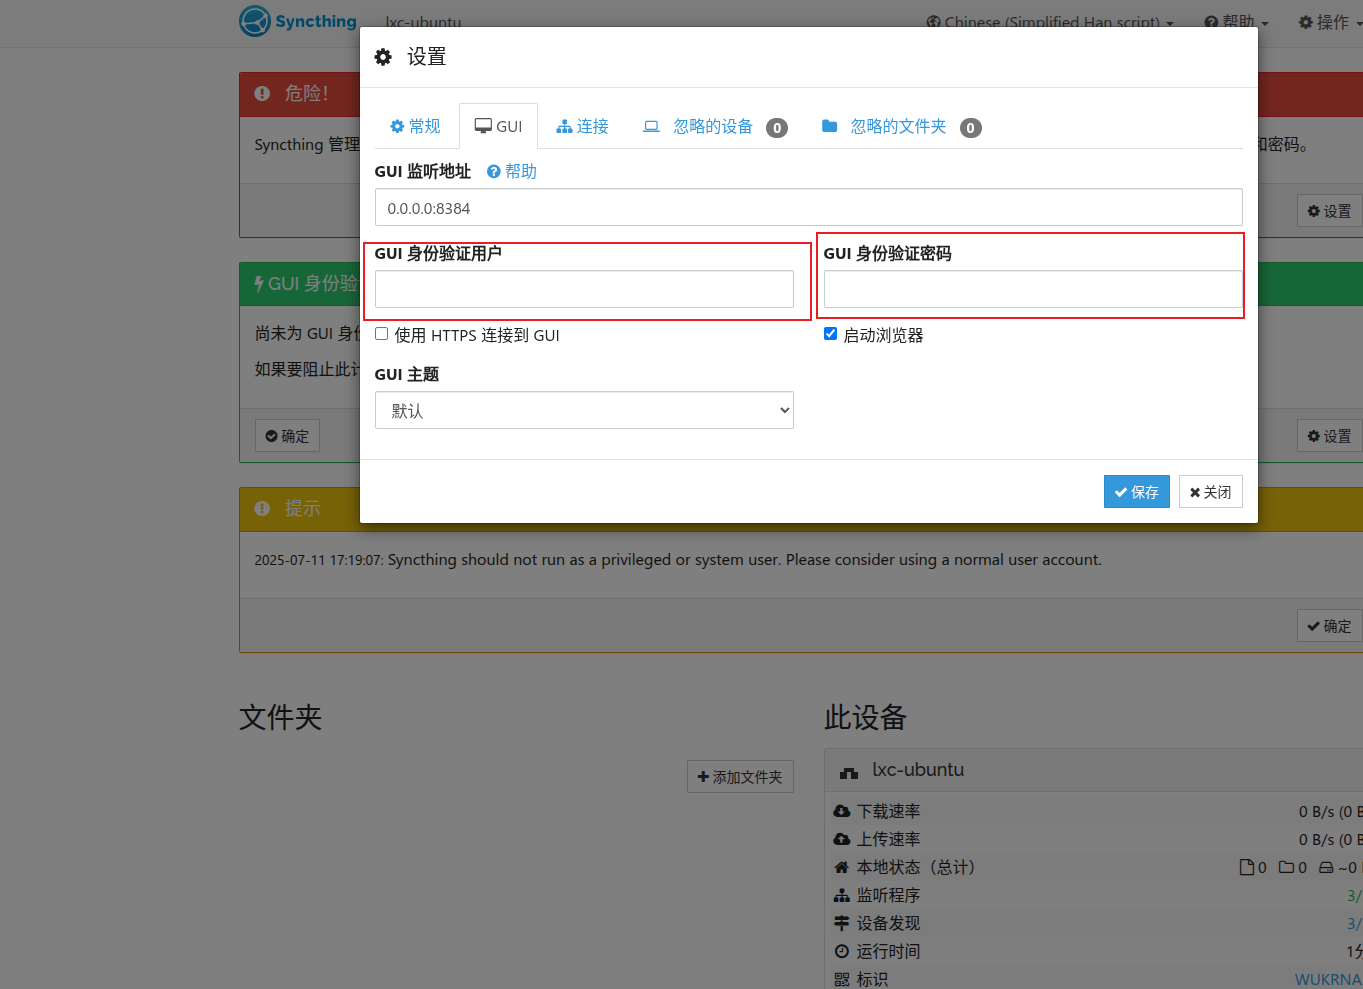
设置密码
点击【危险】里的【设置】按钮,
选择【GUI】页签,设置用户和密码并确认
本文是原创文章,采用 CC BY-NC-ND 4.0 协议,完整转载请注明来自 Ryan的折腾日记
评论
匿名评论
隐私政策
你无需删除空行,直接评论以获取最佳展示效果
